Showing posts with label Burnt Organza Flowers. Show all posts

Thursday, April 22, 2010

Feeling triumphant!


I’ve been so productive in My Creative Space this week.

Little Tweet Tweet is finished! I spent Tuesday at Rod Art Studio working on him and was so happy with how he was looking.   Then at the very last moment – literally, I was just about to run the polishing cloth over for the last time..... the chain snapped. It was so frustrating there was no time to repair it and I couldn’t go home wearing my adorable new pendant like I had imagined all day.
But with a few more hours work on Wednesday I had him ready to go and even better than before. What do you think, worth all of the planning, work and waiting?? I definitely think so, I can’t stop looking at my quirky, one of a kind, hand made necklace!

But that’s not the only creating that’s been going on for me this week. I have been painting, properly painting, with my oils and on the easel painting.  It’s been soooooo long!
A little while ago I started a little sketch book of nothing. I was inspired by Little Guys two year old scribbles, so free and joyous. So I sat down with a charcoal pencil and scribbled and doodled nothing at all. It was fun and freeing, but then I just put the book away and didn’t think of it again. Monday night I ventured into the studio and pulled it out. This little sketch caught my eye and I was inspired to develop it further.
I had to do a lot of rearranging in the studio to clear the easel, but as soon as the paints were spread out and the first glaze was mixed, the smell of the oils brought it all back and I just fell into it.

I’m thrilled with this, my funny, scribbly, painting of nothing! I have called it "Freedom", I just felt so free and creative and comfortable as I painted it. I’m on a roll and I plan to build momentum, I remember now how addictive this feeling is.
 
 "Freedom"
oil on canvas
101 x 76
2010
$200

I also been to the fabric shop and picked up some really great fabrics for more flower brooches. Ooooh and I got some vintage earrings for embellishing the brooches.  But all of that and more is going to have to wait for another post!

Pop over to Kirsty’s and be inspired by creative folk from across the globe, as today is the day everyone shares the goings on in their creative spaces.

Saturday, April 17, 2010

Thanks


While I was at the post office, I popped a couple of little thank you something’s in the mails for one very special lady. Thanks again Cam, I am still sooooo in love with my camera bag!

Thursday, April 8, 2010

Focus????

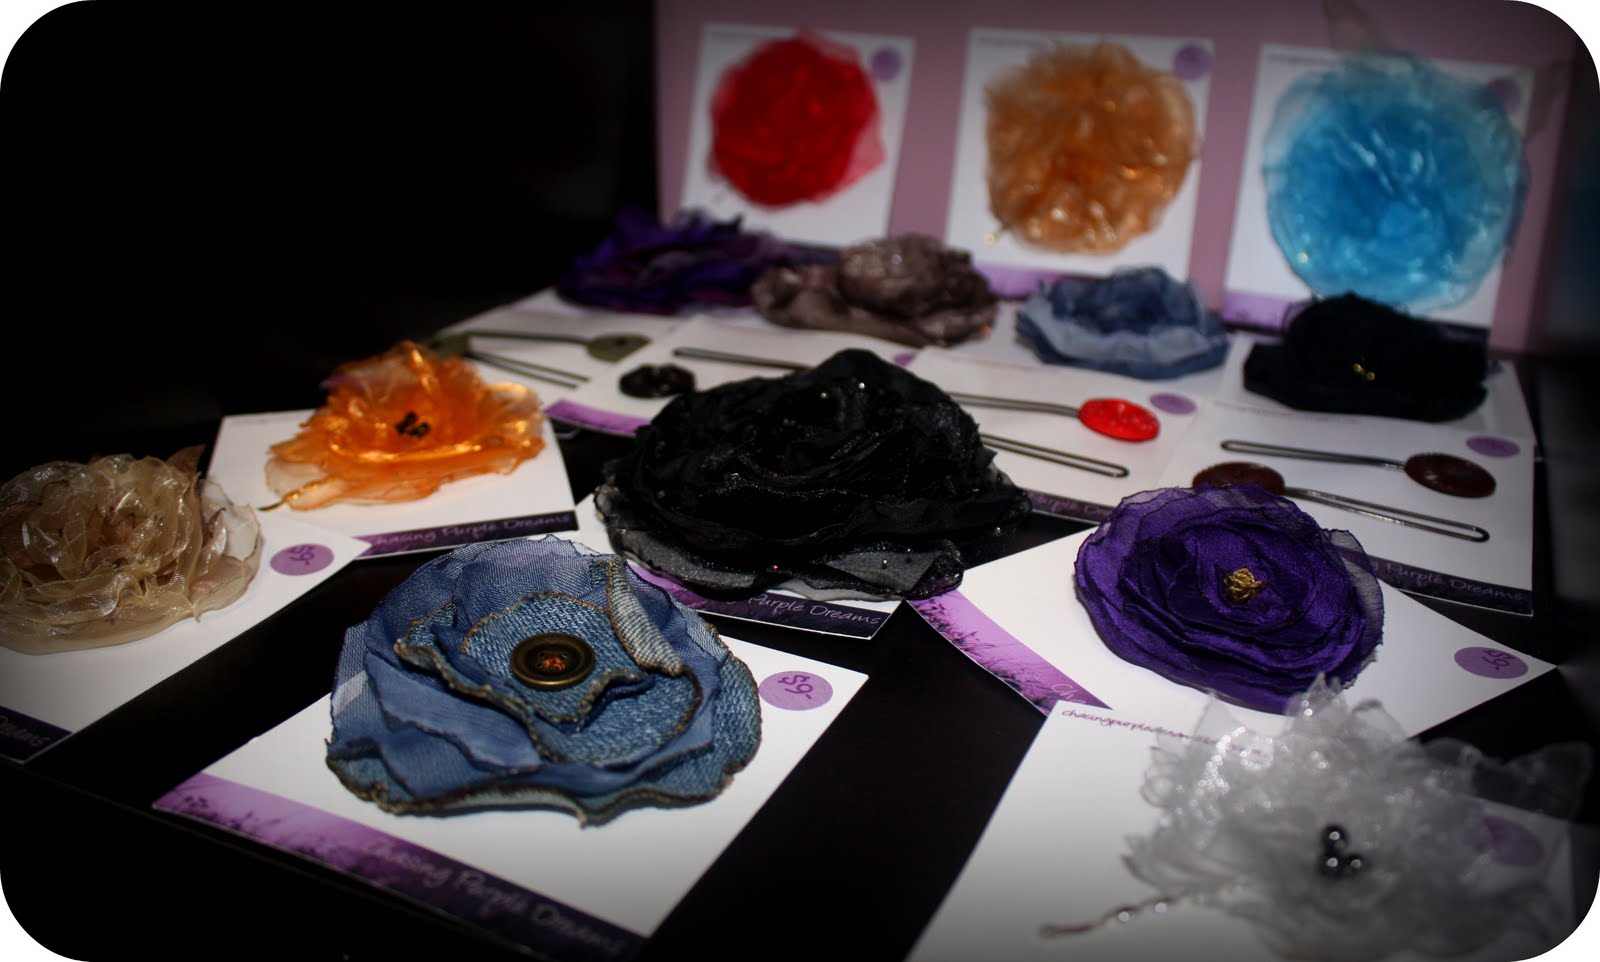
Ok this could be serious……… I might actually be on a roll with one project! So often I flit around from one thing to another; as evidenced in the array of different  projects in previous My Creative Space days. But these flowers might just have me hooked!
I delivered a range of flowery brooches and bobby pins to Handmade Heaven yesterday. They look so good on their new shelf; I’m popping back into today with a little sign and light to jazz up the space even more!
Do you have a favourite? I loved the denim one with the vintage button so much I had to make one for myself!

Go get yourself a cuppa and settle in to check out the creative feast over at Kirsty’s. Don’t miss out of checking out the slippers she just made for herself too – so cute!

Tuesday, April 6, 2010

Flutter by…..


I promise I am not turning this into a photo blog about critters! I know I have posted a lot of critter shots lately, but I couldn’t resist sharing these pics from the weekend.
This one I chased around out backyard for about 20 minutes trying to get a good shot.
It was easier to snap this one as we were out at the river really early and this guy was just hanging around not moving at all. I do hope he was just sleeping, because the sun hadn’t warmed him up yet……. Do butterflies sleep?

Today will be a big day in my studio making flowers. If only I could get a shot of one of these guys on top of one of one of my flowers. What a great product shot that would make!

Thursday, April 1, 2010

A field of flowers for Miriam

I’ve been creating flowers in My Creative Space all week.
How about that? Two weeks in a row on the same project, with my track record you would have to call that focus!
These ones are destined to jazz up a little black dress for Miriam to wear to a wedding. 
I’m going to be so torn at Little Guy’s rest time today, I really should hit the studio so I and add to my range of flower brooches and clips at Handmade Heaven.

BUT, it’s My Creative Space day and I’ll just want to sit down with a cuppa and pop over to Kirsty’s to see what everyone else is up too!

Monday, March 29, 2010

Burnt Organza Flower Tutorial

You asked for it….. so here we go, my first ever tutorial! I’m a bit nervous; I hope it is clear and inspiring.
Draw some different sized circles on your fabric (I am using glass organza in these photos). I cheated and traced Little Guy’s stacking cups, but you don’t have to be precise.  I used a chinograph pencil, it works well on the organza and I had it on hand. I am sure you will find something in your supplies that will work (perhaps even a fabric marking pencil!!!!).
Cut out your circles; don’t worry about being too neat.
We are nearly ready for the fun bit now….. But first a couple of safety tips. Every now and then the fabric catches on fire instead of just melting, so have a bowl of water on hand. I have been able to blow out any wayward flames so far – but “be prepared”.
This is really stinky business, the glass organza isn’t too bad, but some of the fabrics I have used are incredibly smelly (and probably toxic) – so make sure you open all the windows.
Hold the edge of your fabric about half a centimetre away from the side of the flame (you can use a candle for this bit too; the soldering torch is just a bit faster and more precise). The edges should start melting before your eyes; just keep turning the fabric circle around until you have melted all of the edge. Try not to touch the freshly melted bit – IT’S HOT! Repeat on all of your circles.
This next step gives the flowers a natural, organic shape and a nice fullness, but you can skip it if you want flatter, more abstract flowers. I haven’t had any luck using the soldering iron for this step – the cooler candle flame seems to be the way to go. Hold the circle about 5 centimetres above the flame and as soon as it starts to crinkle move it away from the heat. This bit takes a bit of practice; I have burnt holes at this stage quite a bit!
Then just arrange your circles in a stack; biggest to smallest and stitch the layers together.
Then decorate the middle.  I’ve used beads or pearls or little loops of thread; the options are endless.


Please let me know if you have any questions or if any of this is confusing. I would love to see your flowers if you give this a go.
Have fun…..